


Drawing skulls can be both a fascinating and challenging artistic endeavor. Whether you are a beginner or an experienced artist, understanding the intricacies of skull anatomy and mastering the techniques to draw them can enhance your skills and add depth to your artwork. This article will guide you through the essentials of drawing skulls, from basic structure to adding realistic details.
Introduction to Skull Drawing
Drawing skulls isn’t just for Halloween. Artists use skulls to understand human anatomy, create dark or gothic art, and practice shading techniques. This guide will cover everything from the basic shapes and proportions of skulls to more advanced techniques for realistic rendering.
Understanding Skull Anatomy
Basic Structure of the Skull
Before diving into drawing, it’s essential to understand the skull’s basic structure. The skull consists of several bones fused together, forming the cranium and the facial bones.
- Cranium: The cranium houses and protects the brain. It includes the frontal bone (forehead), parietal bones (sides and roof), and occipital bone (back).
- Facial Bones: These include the maxilla (upper jaw), mandible (lower jaw), nasal bones, and zygomatic bones (cheekbones).
Proportions and Key Landmarks
To draw a skull accurately, keep these proportions and landmarks in mind:
- Eye Sockets: The eye sockets are roughly halfway down the skull. They are large and rounded.
- Nose Cavity: Located between the eye sockets, the nose cavity is a prominent triangular shape.
- Cheekbones: The zygomatic bones create the cheekbones and are just below the eye sockets.
- Teeth: The teeth are part of the maxilla and mandible. They should be proportional to the skull size.

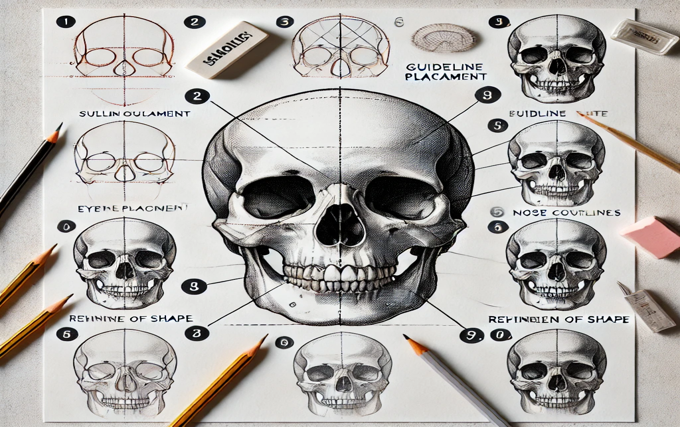
Step-by-Step Guide to Drawing a Skull
Step 1: Sketch the Basic Shape
Start with a light sketch to outline the basic shape of the skull. Use a circle for the cranium and an oval for the jaw.
Step 2: Add Guidelines
Draw vertical and horizontal guidelines to help place the skull’s features. These lines will assist in aligning the eyes, nose, and mouth.
Step 3: Outline the Major Features
- Eye Sockets: Draw the eye sockets as large rounded rectangles or circles.
- Nose Cavity: Sketch a triangle for the nose cavity.
- Cheekbones: Add the cheekbones extending from the sides of the eye sockets.
- Teeth: Draw the teeth in the upper and lower jaws, ensuring they are proportional.
Step 4: Refine the Shape
Begin refining the skull’s shape, making adjustments to the proportions and adding more detail to the features.
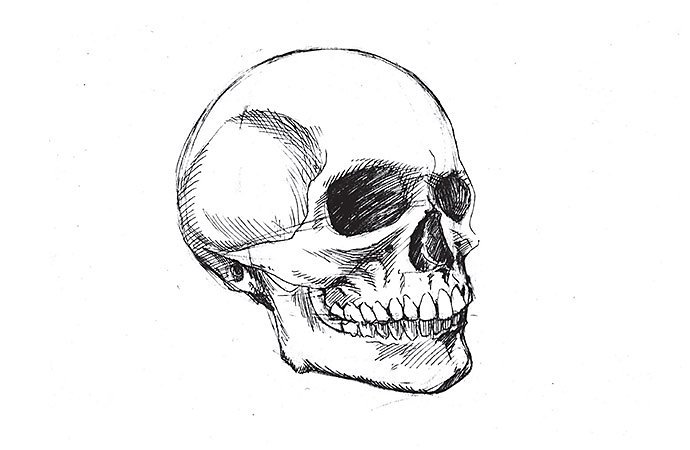
Step 5: Add Shading and Details
Shading is crucial to make your skull drawing look realistic. Use a range of pencil shades to add depth. Focus on these areas:
- Eye Sockets: Add darker shading inside the eye sockets to create a hollow effect.
- Nose Cavity: Shade the nose cavity darker.
- Cheekbones and Jawline: Use lighter shading to define the cheekbones and jawline.
Step 6: Final Touches
Add any final touches to enhance the realism of your drawing. This could include additional shading, highlights, and small details like cracks or texture on the skull.
Tips for Drawing Realistic Skulls
- Study Real Skulls: Observe real skulls or high-quality images to understand their structure and details.
- Practice Shading Techniques: Experiment with different shading techniques to add depth and dimension.
- Use References: Use reference images to guide your drawing and ensure accuracy.
- Be Patient: Drawing skulls can be challenging, so take your time and practice regularly.
Common Mistakes to Avoid
- Incorrect Proportions: Ensure the proportions of the skull are accurate. Use guidelines to help with this.
- Overlooking Details: Pay attention to the small details that make a skull look realistic, such as the shape of the teeth and the texture of the bones.
- Flat Shading: Avoid flat shading by using a range of pencil shades to create depth and dimension.
Conclusion
Drawing skulls combines anatomical knowledge and artistic skill, making it a rewarding challenge for artists. This guide covers the basics of skull structure, including the cranium and facial bones, and emphasizes the importance of accurate proportions and key landmarks. Starting with simple shapes and using guidelines ensures proper alignment of features like eye sockets, nose cavity, cheekbones, and teeth. Adding depth through shading brings the drawing to life. Regular practice, observation of real skulls, and using references enhance accuracy and realism. Patience and persistence are essential, as mastering skull drawing takes time and dedication. Happy drawing!


