


Creating engaging YouTube videos requires more than just visual content; the right voiceover can make your videos more compelling and professional. With the rise of AI technology, adding high-quality voiceovers has become easier and more accessible, even if you’re running a faceless YouTube channel. In this step-by-step guide, we’ll show you how to use free AI text-to-speech tools to create YouTube videos that stand out. Whether you’re a beginner or an experienced content creator, this guide will help you elevate your video production process.
1. Why Use AI Text-to-Speech Tools for YouTube Videos?
Before diving into the steps, it’s essential to understand why AI text-to-speech tools are beneficial for YouTube content creators:
- Cost-Effective: Hiring a professional voice actor can be expensive. Free AI voice text-to-speech tools provide a free alternative that delivers high-quality results.
- Quick Turnaround: These tools allow you to generate voiceovers instantly, speeding up the video production process.
- Perfect for Faceless YouTube Channels: If you’re running a faceless YouTube channel, AI-generated voiceovers offer a way to add a voice to your content without revealing your identity.
- Diverse Voice Options: AI tools offer a variety of voices, accents, and languages, allowing you to tailor the voiceover to your audience.
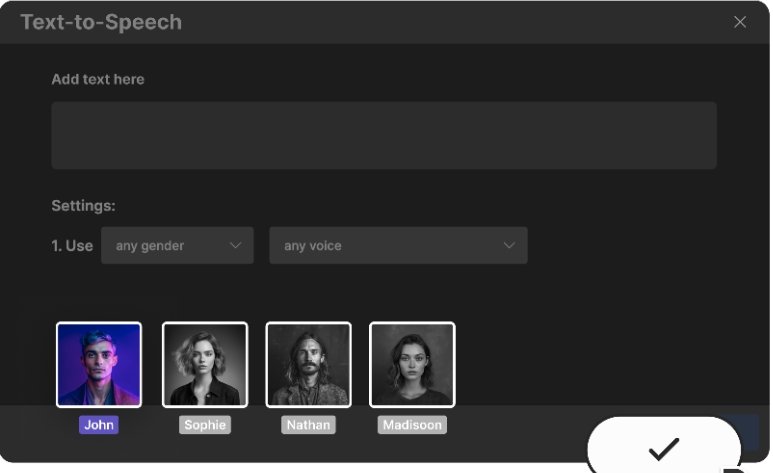
2. Step 1: Choose the Right AI Text-to-Speech Tool
There are several free AI text-to-speech tools available online, each with its own set of features. Some popular options include:
- Google Text-to-Speech: A reliable and straightforward tool that integrates well with other Google services.
- Natural Reader: Offers a range of voices and the ability to adjust speed and pitch.
- IBM Watson Text-to-Speech: Known for its high-quality voices and customization options.
When selecting a tool, consider factors like voice quality, customization options, and ease of use. If you plan to use the voiceover regularly, you might also want to look for a tool that offers a good balance between free and premium features.
3. Step 2: Prepare Your Script
A clear and engaging script is the foundation of any great voiceover. Here are some tips for writing an effective script:
- Keep It Concise: YouTube viewers typically have short attention spans, so keep your script concise and to the point.
- Use Simple Language: Avoid jargon and complex sentences that might be difficult for the AI to process or for your audience to understand.
- Add Emphasis Where Needed: Some AI tools allow you to add emphasis to certain words or phrases. Use this feature to highlight key points in your script.
Once your script is ready, review it for clarity and flow. Ensure that it matches the tone and style of your video.
4. Step 3: Generate the Voiceover
Now that your script is ready, it’s time to generate the voiceover using your chosen AI tool. Here’s how to do it:
- Input the Script: Copy and paste your script into the text input area of the AI text-to-speech tool.
- Select the Voice: Choose a voice that best fits your content. If the tool offers customization options, adjust the pitch, speed, and tone to match the desired style.
- Preview the Voiceover: Listen to a preview of the voiceover to ensure it sounds natural and matches the script. Make any necessary adjustments.
- Download the Audio File: Once you’re satisfied with the voiceover, download the audio file to your computer.
5. Step 4: Integrate the Voiceover with Your Video
With your voiceover ready, the next step is to integrate it into your video. This can be done using a video editing software or an AI video creator app. Here’s how:
- Import Your Video: Open your video editing software or AI video creator app and import your video file.
- Add the Voiceover: Import the AI-generated voiceover and place it on the audio track of your video timeline.
- Sync the Audio with the Video: Adjust the timing of the voiceover to match the visuals in your video. Make sure the voiceover complements the content and doesn’t overlap with any important visual elements.
- Adjust Audio Levels: Ensure that the voiceover is clear and balanced with any background music or sound effects.
If you’re using an many of these steps can be automated, making the process even more efficient.
6. Step 5: Finalize and Upload Your Video
After integrating the voiceover, it’s time to finalize your video:
- Review the Video: Watch the entire video to ensure that everything is in sync and the voiceover flows smoothly with the visuals.
- Make Final Adjustments: If necessary, make any final tweaks to the audio levels, timing, or visuals.
- Export the Video: Once you’re happy with the final product, export the video in your desired format and resolution.
Finally, upload your video to YouTube, ensuring that you optimize the title, description, and tags for better visibility and reach.
Conclusion
Free AI text-to-speech tools offer a powerful way to add professional voiceovers to your YouTube videos, helping your content stand out in a crowded marketplace. Whether you’re running a faceless YouTube channel or simply looking for a cost-effective solution to enhance your videos, these tools can make a significant difference. By following the steps outlined in this guide, you can efficiently create engaging videos that resonate with your audience.
As you continue to produce content, consider exploring different AI video creator apps and voice customization options to further refine your video marketing strategy. Embrace the power of AI to elevate your YouTube channel and connect with viewers worldwide.